



CDN Deep Dive: How to Choose and Configure the Best CDN for WordPress
In today’s fast-paced digital landscape, website speed and performance are paramount. A sluggish website can lead to frustrated users, higher bounce rates, and ultimately, lower conversions. If you’re serious about your WordPress site’s success, a Content Delivery Network (CDN) is no longer a luxury—it’s a necessity.
But with so many CDN providers and configuration options available, how do you choose the right one and set it up effectively for your WordPress website? This deep dive will guide you through the process.
What is a CDN and Why Do You Need One for WordPress?
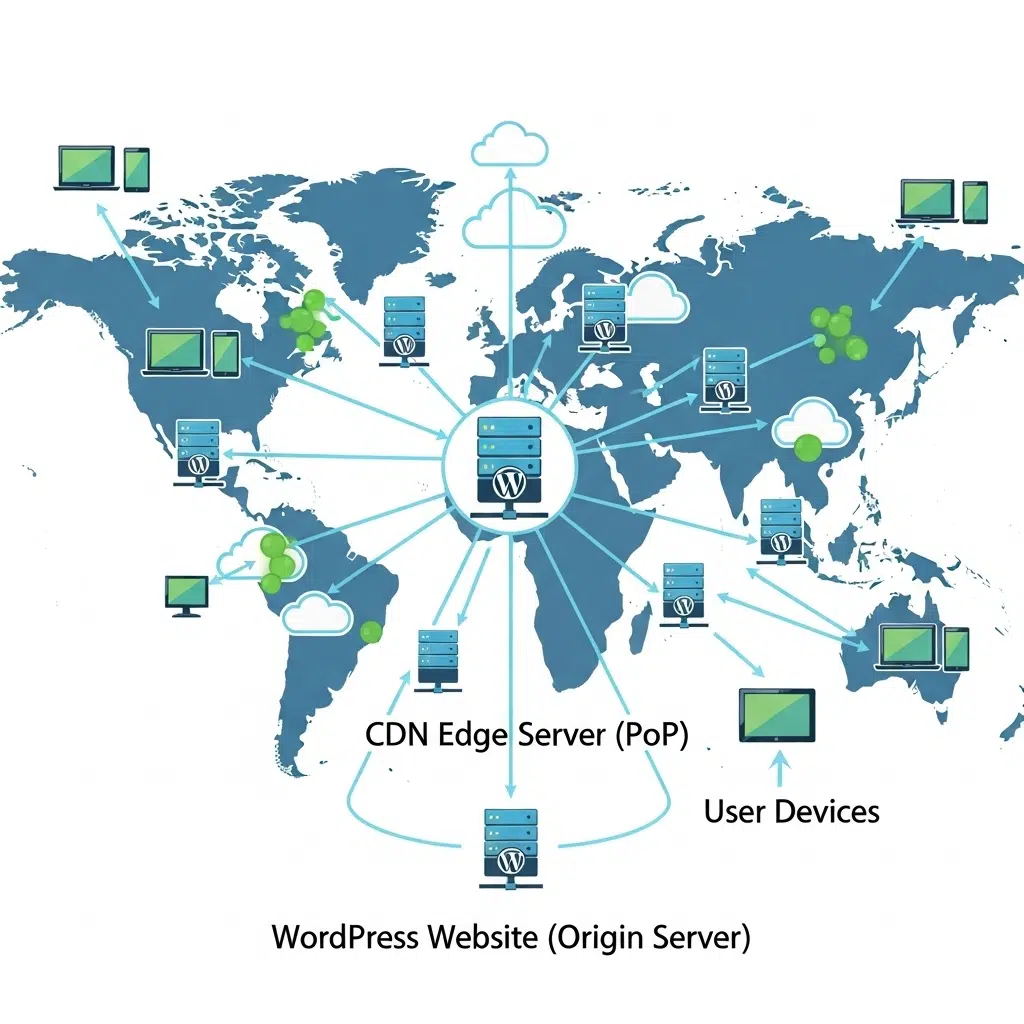
At its core, a CDN is a network of geographically distributed servers that store cached copies of your website’s static assets, such as images, CSS, JavaScript, and videos. When a visitor accesses your site, the CDN server closest to their location delivers these assets, significantly reducing latency and improving loading times.
Here’s why a CDN is crucial for your WordPress site:
- Improved Website Speed and Performance: By serving content from geographically closer servers, CDNs drastically reduce the time it takes for your website to load. This leads to a better user experience and can positively impact your search engine rankings.
- Reduced Server Load: Offloading the delivery of static assets to the CDN frees up your origin server’s resources, allowing it to handle dynamic requests more efficiently. This is especially beneficial during traffic spikes.
- Enhanced Website Security: Many CDN providers offer additional security features like DDoS protection, web application firewalls (WAFs), and SSL/TLS encryption, adding an extra layer of defense to your WordPress site.
- Increased Reliability and Availability: With content distributed across multiple servers, a CDN can ensure that your website remains accessible even if one server experiences downtime.
- Better SEO: Search engines like Google consider website speed as a ranking factor. A faster website can lead to improved search engine visibility.
Key Factors to Consider When Choosing a CDN for WordPress:
Selecting the right CDN for your WordPress site requires careful consideration of several factors:
- Global Network and Points of Presence (POPs): The more strategically located POPs a CDN has, the better its performance will be for your global audience. Consider where the majority of your website visitors are located.
- Performance and Speed: Look for a CDN known for its low latency, high throughput, and efficient caching mechanisms. Check independent reviews and performance benchmarks.
- Security Features: Evaluate the CDN’s security offerings, including DDoS protection, WAF, bot mitigation, and secure protocols.
- Pricing and Billing: CDN pricing models vary. Some charge based on bandwidth usage, while others offer flat-rate plans. Consider your website’s traffic volume and choose a plan that fits your budget.
- Ease of Integration with WordPress: Look for CDNs that offer seamless integration with WordPress through plugins or simple configuration steps.
- Customer Support: Responsive and knowledgeable customer support is crucial if you encounter any issues. Check for the availability of documentation, tutorials, and support channels.
- Analytics and Reporting: A good CDN should provide detailed analytics on content delivery, performance, and security, allowing you to monitor and optimize your setup.
- Additional Features: Some CDNs offer features like image optimization, video delivery, and mobile acceleration. Consider if these features are relevant to your website’s needs.
Popular CDN Providers for WordPress:
Here are some popular and highly-regarded CDN providers that work well with WordPress:
- Cloudflare: A popular choice offering a free plan with basic CDN features and robust security options. Their paid plans offer more advanced features and performance.
- Sucuri: Primarily known for its security solutions, Sucuri also offers a powerful CDN with a focus on website protection and performance.
- KeyCDN: A cost-effective and high-performance CDN with a pay-as-you-go pricing model and a global network.
- StackPath (formerly MaxCDN): Offers a robust CDN with a focus on speed, security, and developer-friendly features.
- Bunny.net: A relatively newer player known for its speed, simplicity, and transparent pricing.
- Amazon CloudFront: A highly scalable and customizable CDN from Amazon Web Services, offering extensive features and global reach.
Configuring Your WordPress Site to Use a CDN:
Once you’ve chosen a CDN provider, you’ll need to configure your WordPress site to integrate with it. The exact steps may vary depending on your chosen CDN and WordPress setup, but here’s a general overview:
- Sign Up for a CDN Account: Create an account with your chosen CDN provider and select a suitable plan.
- Add Your Website to the CDN: Follow your CDN provider’s instructions to add your WordPress website as a “zone” or “origin.” This typically involves providing your website’s domain name.
- Configure DNS Settings (if required): Some CDN providers require you to change your domain’s DNS records (specifically the CNAME record) to point to their servers. This allows the CDN to handle requests for your static assets. Your CDN provider will provide the necessary DNS information.
- Install a WordPress CDN Plugin: Many popular CDN providers offer dedicated WordPress plugins that simplify the integration process. Install and activate the plugin on your WordPress site. Examples include the Cloudflare plugin, the Sucuri Security plugin, and plugins for other CDN providers.
- Configure the CDN Plugin: Within the plugin settings, you’ll typically need to provide your CDN account details and specify which static file types (e.g., .css, .js, .jpg, .png) should be served through the CDN.
- Purge Cache (if necessary): After configuring the CDN, you may need to clear your website’s cache and the CDN’s cache to ensure that the new settings are applied.
- Test Your CDN Integration: Use website speed testing tools (like Google PageSpeed Insights, GTmetrix, or WebPageTest) to verify that your static assets are being served from the CDN’s servers. Look for the CDN provider’s domain in the waterfall analysis of the test results.
Best Practices for CDN Configuration:
- Enable HTTPS on Your CDN: Ensure that your CDN supports and is configured to use HTTPS to maintain end-to-end encryption.
- Configure Cache Settings: Understand your CDN’s caching options and configure them appropriately to balance performance and content freshness.
- Set Up Browser Caching: Leverage browser caching in conjunction with your CDN to further reduce loading times for returning visitors.
- Consider Using a CNAME: Using a CNAME (Canonical Name) record to point your CDN URL to a subdomain of your own domain (e.g., https://www.google.com/search?q=cdn.yourdomain.com) can provide a more consistent branding experience.
- Regularly Monitor Your CDN Performance: Use the analytics provided by your CDN to track its effectiveness and identify any potential issues.
- Test After Making Changes: Always test your website thoroughly after making any changes to your CDN configuration.
Conclusion:
Implementing a CDN is a significant step towards optimizing your WordPress website’s speed, performance, and security. By carefully choosing a CDN provider that meets your specific needs and configuring it correctly, you can deliver a faster and more reliable experience to your visitors, ultimately contributing to the success of your online presence. Take the time to research your options, follow the configuration steps diligently, and enjoy the benefits of a faster, more secure WordPress website.


 Start chat